
How to Tell if Silver Jewelry is Fake
If you've ever picked up a shiny silver bracelet or necklace thinking it's the real deal, only to wonder later if you've been duped, this guide is for you. Spotting fake silver jewelry boils down to a mix of smart observation, simple home tests, and knowing what real silver looks and feels like.
Right off the bat, the quickest way to check is by looking for a "925" hallmark stamp, which means it's sterling silver (92.5% pure), and then confirming with a magnet test, if it sticks, it's probably not silver. But don't stop there; we'll dive deeper into reliable methods to help you avoid fakes confidently. Whether you're shopping at a flea market, online, or from a boutique, these tips will empower you to make savvy choices without needing fancy equipment. Let's get started on turning you into a silver sleuth!
In this article, we'll first break down what real silver is and how fakes sneak in, then walk you through hands-on tests you can do at home. By the end, you'll have a step-by-step process to evaluate any piece. I've kept things straightforward, with real-life stories from folks I've chatted with over the years, and plenty of budget-friendly hacks using stuff you likely have in your kitchen or toolbox. No jargon here, just practical advice to save you money and frustration.
Understanding Silver Types and Common Fakes

To tell whether silver jewelry is genuine, it helps to understand one key fact first: real silver is almost always an alloy, while fake silver is usually a cheap base metal with a thin silver-colored coating. Knowing this upfront gives you an immediate advantage. Genuine silver has distinct traits, weight, feel, and natural tarnish, that counterfeits simply can’t replicate. Let’s break this down so you can confidently evaluate pieces before you buy.
Why Real Silver Isn’t “Pure”
Pure silver (also called fine silver) is 99.9% silver, marked as 999. While beautiful, it’s far too soft for everyday jewelry, it bends easily and scratches quickly. For that reason, most wearable jewelry is made from sterling silver, an alloy containing 92.5% silver and 7.5% other metals, usually copper. This blend adds durability while preserving silver’s shine.
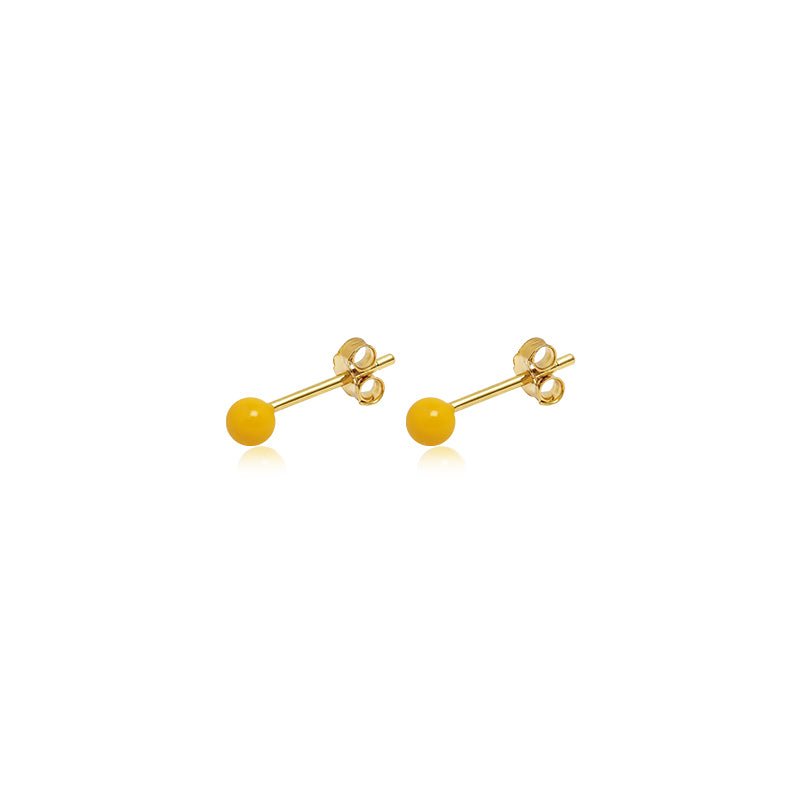
Sterling silver is typically stamped “925,” “STER,” or “STERLING.” Fine silver does exist, but it’s uncommon in everyday jewelry and is usually reserved for collector or custom pieces. Be cautious of items labeled “pure silver” at bargain prices, these are often silver-plated pieces that discolor or even turn skin green after short wear.
Common Types of Fake or Misleading “Silver”
Many counterfeits look convincing at first glance. The most common include:
- Silver-plated jewelry: A very thin layer of silver (sometimes less than 0.1%) applied over brass, nickel, or zinc. These wear down quickly and often flake or discolor.
- German silver / Alpaca silver: Despite the name, these contain no silver at all. They’re made from nickel, copper, and zinc.
- Silver-filled pieces: Contain a thicker silver layer (about 5–10%) bonded to a base metal, but still not solid silver.
- White gold or platinum: These can be mistaken for silver but are heavier and significantly more expensive.
Price and Source Matter
Price is often the first red flag. A simple sterling silver necklace usually starts around $20–$30, depending on weight and craftsmanship. Deals far below that, especially from unverified sellers, are suspicious. Reputable brands and artisans often provide authenticity details, certificates, or clear sourcing information, while fake pieces are typically mass-produced.
Practical Shopping Tips
- Online: Zoom in on photos to check for uneven coloring, blurry stamps, or poor finishing. Read reviews carefully, comments like “turned my finger green” are a strong warning sign.
- In-store: Compare multiple pieces. Real silver feels cool to the touch and has noticeable weight. Use your phone’s flashlight to inspect the surface, fake pieces often reveal a yellowish tint beneath the plating.
Understanding Hallmarks
Beyond “925,” you may see:
- “STER” or “STERLING” in the U.S.
- European marks, such as numbers like 800 (80% silver, common in vintage items) or animal symbols.
Fake jewelry may skip hallmarks entirely or use poorly made stamps that look shallow, misspelled, or oddly placed, often on less noticeable areas.
Additional Red Flags
- No tarnish at all after long use (unless it’s rhodium-coated).
- A strong metallic smell when rubbed, indicating zinc or nickel.
- Jewelry that feels hollow or unusually light for its size.
A Simple Pre-Purchase Checklist
Before buying, mentally run through these steps:
- Check for hallmarks
- Assess the weight and feel
- Confirm return policies or authenticity guarantees
With these fundamentals, you’re no longer guessing, you’re evaluating evidence. This foundation puts you well ahead of most buyers and prepares you for hands-on testing and deeper verification next.
Simple Home Tests to Spot Fakes: Step-by-Step Hands-On Checks You Can Do Right Now

The most reliable way to tell if silver jewelry is fake at home is through a series of easy tests that check its physical properties, like conductivity, magnetism, and reaction to acids, starting with non-destructive ones and moving to more involved if needed. These methods use everyday items and give quick results, often in minutes, helping you confirm suspicions without damaging most pieces. We'll walk through them in numbered steps under subheadings for clarity, building from simplest to advanced, so you can stop at any point if you're convinced.
Visual and Hallmark Inspection: Your First Line of Defense with Just Your Eyes
To quickly spot fake silver jewelry visually, examine it closely for authentic markings and uniform quality, real pieces have clear, deep stamps like "925" and even color without pits or bubbles. This test takes seconds and costs nothing, making it the perfect starting point.
Step 1: Gather your tools. You'll need good lighting (natural daylight is best), a magnifying glass or your phone's zoom camera, and the jewelry piece. If you don't have a magnifier, use reading glasses or even a clean water droplet on your phone lens for makeshift magnification, a hack that works in a pinch.
Step 2: Locate potential hallmarks. Flip the piece over and check common spots: the clasp on necklaces, inside rings, back of pendants, or earring posts. Real sterling silver almost always has a stamp. Look for "925," "STER," "S925," or regional marks like a lion in the UK. If there's no mark, it's likely fake or very old, vintage silver might lack stamps, but that's rare today.
Step 3: Assess the stamp quality. Genuine stamps are crisp, evenly deep, and not smeared. Fakes often have shallow, blurry, or off-center marks because counterfeiters use cheap tools. For example, a friend once showed me a bracelet with a "925" that looked handwritten, definitely fake. Also, check if the stamp matches the piece's style; a modern chain with an antique-looking mark is suspicious.
Step 4: Inspect overall appearance. Real silver has a soft, white-gray sheen, not overly bright like chrome. Look for uniformity, no thin spots where base metal shows through. Bubbles or peeling indicate poor plating. Rub your finger over it; real silver feels smooth, not gritty.
Step 5: Compare with known reals. If you own verified silver, hold them side by side. Differences in luster or color pop out. No real piece? Search online for "sterling silver hallmark examples" on your phone for visual refs, but remember, photos can be faked too, so use trusted sites like jewelers' associations.
This test caught a fake earrings set for me last year; the "925" was there, but uneven coloring screamed plating. If it passes, great, move on. If not, try the next test for confirmation.
Magnet Test: A Quick Magnetic Check to Rule Out Ferrous Fakes

Fake silver jewelry often contains magnetic metals like iron or steel under the plating, so a simple magnet test reveals this instantly, if it attracts strongly, it's not pure silver. This is foolproof for many fakes and uses a household fridge magnet.
Step 1: Get a strong magnet. Not all magnets work; use a neodymium one from a hardware store (cheap, under $5) or even a speaker magnet. Avoid weak fridge magnets for subtle pulls.
Step 2: Clean the jewelry. Wipe off dirt or oils with a soft cloth to ensure accurate contact. Place it on a flat, non-metallic surface like wood or plastic.
Step 3: Hover the magnet. Bring it close without touching, real silver won't react at all since it's non-magnetic. If it jumps or sticks, it's fake with ferrous content. Note: Some alloys like copper in sterling aren't magnetic, but nickel in fakes might be weakly so, test multiple spots.
Step 4: Test the force. If there's a slight pull, it could be a low-grade fake; strong attraction means definite impostor. For chains, dangle and see if links stick.
Step 5: Interpret results carefully. Passing doesn't prove it's real (non-magnetic fakes exist), but failing confirms fake. Combine with visuals for surety. I used this on a thrift find once, the ring stuck like glue, saving me $10.
Budget alternative: No magnet? Use a compass app on your phone; real silver won't deflect the needle much.
Ice Melt Test: Harnessing Silver's Heat Conductivity for a Chilly Reveal
Silver is an excellent heat conductor, so placing ice on it melts faster than on fakes, this test shows authenticity through quick melting in under 30 seconds. It's safe and fun, using freezer ice.
Step 1: Prepare ice cubes. Freeze water in a tray; use small pieces for precision. Have two similar items if comparing, a known real vs. suspect.
Step 2: Set up on a room-temp surface. Place the jewelry flat; ensure it's at ambient temperature (not cold from outside).
Step 3: Apply ice. Put a cube directly on the piece. Time how fast it melts, real silver pulls heat from the air, melting ice rapidly into a puddle.
Step 4: Observe and compare. On fake metals like aluminum, ice lingers longer. For example, my real silver spoon melted ice in 15 seconds; a fake fork took over a minute.
Step 5: Clean up and note. Wipe dry to avoid water spots. This test shines for larger pieces like bracelets; for tiny earrings, use a bigger ice chip.
Hack: In a hot climate? Chill the room first for contrast. This confirmed a necklace for a coworker, ice vanished quick, proving sterling.
Smell and Sound Test: Sensory Clues from Rubbing and Tapping

Real silver has no strong odor when rubbed and rings with a clear, high pitch when tapped, unlike fakes that smell metallic or thud dully, this dual test engages your senses for subtle differences.
Step 1: For smell, rub vigorously. Use clean hands; rub the piece between fingers for 10-20 seconds. Sniff closely, real silver is odorless or faintly sweet; fakes reek of copper or chemicals.
Step 2: Note reactions. If your skin turns blackish, it's likely real (from sulfur in air reacting). Fakes might leave green residue.
Step 3: For sound, tap gently. Use a coin or hard surface; drop from a few inches. Listen for a bell-like ring vs. a flat clunk.
Step 4: Compare sounds. Real chains jingle brightly; fakes sound muffled. I tested a pendant this way, the dull thunk revealed brass core.
Step 5: Combine senses. If smell is off and sound dull, strong fake indicator. Great for markets where you can't use liquids.
Nitric Acid Test: A More Advanced Chemical Confirmation (With Cautions)
For definitive proof, nitric acid reacts differently with real silver (creamy white color) versus fakes (green or black), this destructive test is last resort but accurate, using kit acid.
Step 1: Buy a test kit. Get a silver testing solution (nitric acid-based) online for $10-20; includes dropper and instructions.
Step 2: Safety first. Wear gloves, work in ventilated area; acid can burn skin or damage jewelry.
Step 3: Scratch a hidden spot. Use a file to make a small mark, exposing inner metal.
Step 4: Apply drop. Watch reaction: Real turns milky white or red-brown; fakes bubble green (copper) or stay clear.
Step 5: Neutralize and clean. Rinse with baking soda water. This busted a "heirloom" brooch for me, green meant fake.
Alternative: If no kit, skip or visit a jeweler. Always test inconspicuously.
By following these steps sequentially, you'll methodically verify any piece. Start visual, end chemical if needed, most fakes fail early.
When to Seek Professional Help and Prevention Tips: Wrapping Up with Pro Advice
If home tests leave doubts, a jeweler's acid test or XRF scanner confirms silver content accurately without guesswork, this ensures peace of mind for valuable items. Pros charge $10-50, worth it for heirlooms.
To prevent fakes, buy from trusted sources like certified jewelers or brands with guarantees. Clean real silver with baking soda paste to maintain, fakes won't hold up.
You've now got the tools to spot fakes confidently. Practice on your collection, and share stories in comments!


Leave a comment